After getting ink all over my brand new Duvet cover, I knew it was time to create a space where I could write, read, pay bills or do anything that involves a pen and really shouldn’t be done in a bed anyway.
Not only did it takes me hours to get the ink off of my Duvet but working in bed is not really conducive to productivity – at least not for me. So I started my search for the perfect desk.
My requirements were simple:
- A large enough desk to have my laptop out and still have enough writing space
- Small enough to not need a room of its own
- Lots of drawers to store notebooks, binders, bills, files, pens etc…can you tell I have an obsession with pens?
- It had to have good bones e.g. solid oak or another type of wood
- Needed to be $50 or less
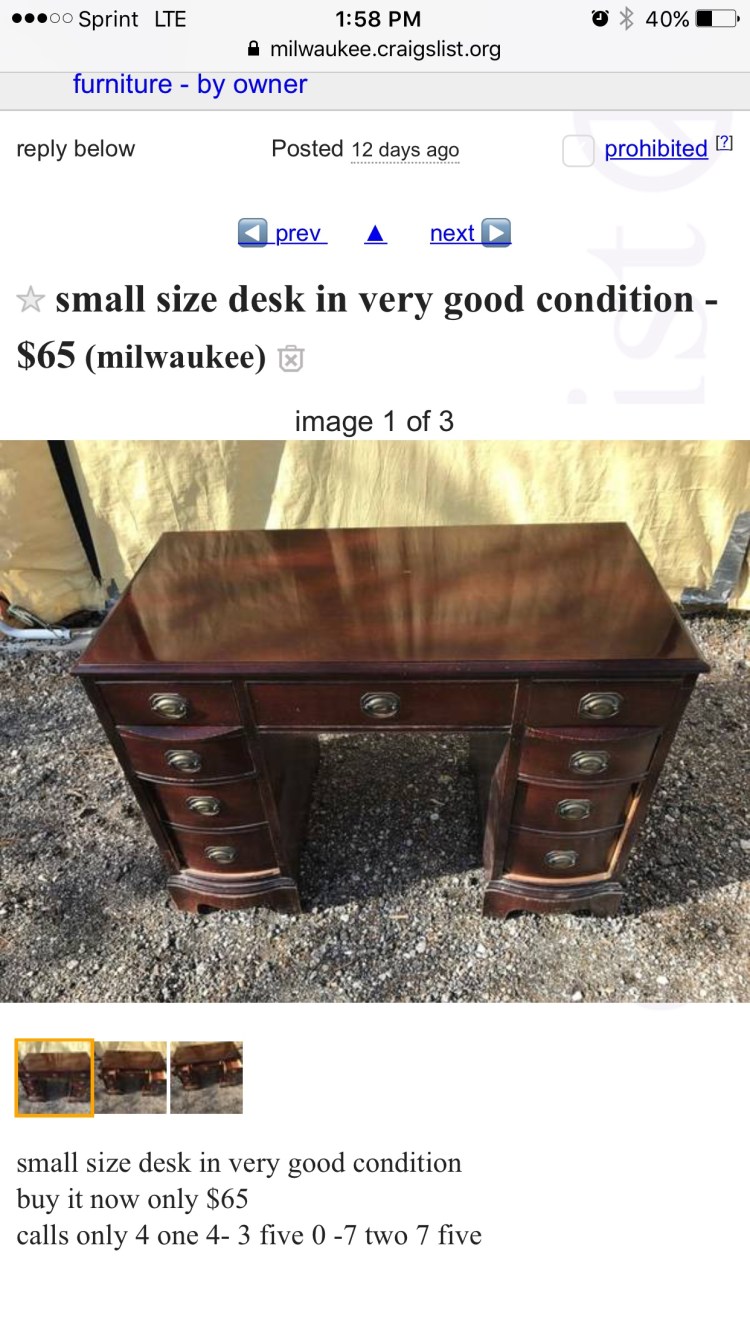
This is what I found……
 Given my history of spills and the fact that I wanted to make this my main workspace, I knew that going with an oil based paint would be the best option because of how durable it is. I also knew that I wanted a glossy finish, which is a lot easier to achieve with an oil base versus a latex base.
I needed the desk to be functional but also wanted it to be chic & girl boss-ish.
To keep this project as inexpensive as possible – I opted to keep the same hardware and just spray paint it gold.
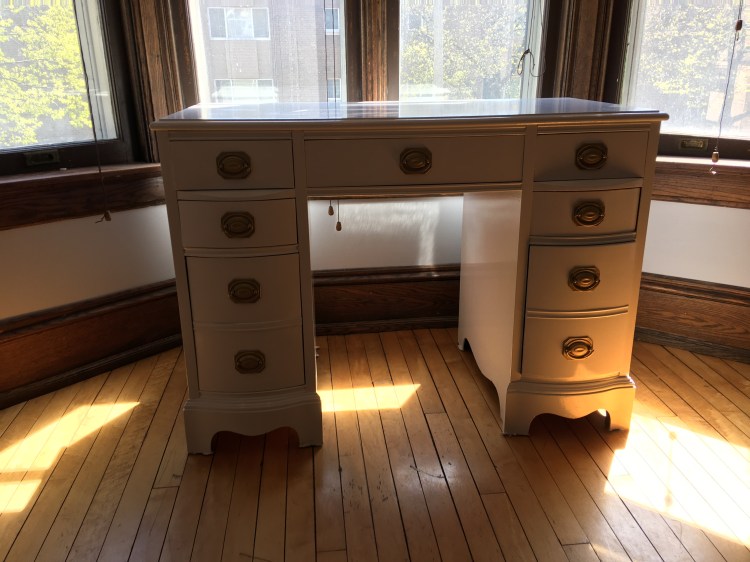
Here is what I ended up with…
What you’ll need:
- a drop cloth if you are doing this indoors like I did. I recommend doing it outside if weather permits or in a garage if you have one. ( I live in Wisconsin and do not have a garage, so I did it inside)
- 1-2 good quality paint brushes
- sand paper
- a washcloth + soap & water
- a screwdriver
- Spray paint (I used Rust-oleum)
- oil base paint (I used Rust-oleum)
- paint thinner or mineral spirits for clean-up.


To start out, you’ll need to remove all of the drawers and hardware. Once you are finished with that, get sanding!
Though oil paints are messy and sometimes harder to work with you can generally, skip priming which saves a lot of time and money! You also don’t need to spend hours sanding, just sand lightly, making sure to focus on areas with scratches and roughness.
 Yeah, so I forgot to get a drop cloth at first – try to ignore the purple sheet.
When you are done sanding, all you have to do is grab your washcloth and a small amount of soap and water and clean that baby off. Once it is fully dry, you can start painting.
It is really important to spend a few extra dollars on a quality paint brush otherwise, you will see every brush stroke. I recommend starting with the top first, that way if anything drips down you have a chance to smooth it out before it dries. A lot of painters will tell you to paint in the the same direction as the grain of the wood – but I don’t think that is necessary. However, you should pick the direction you are going and stick with it.
With this paint, a little goes a long way. Take the time to really spread it out adding more only as needed.
Here are my results after just one coat of paint…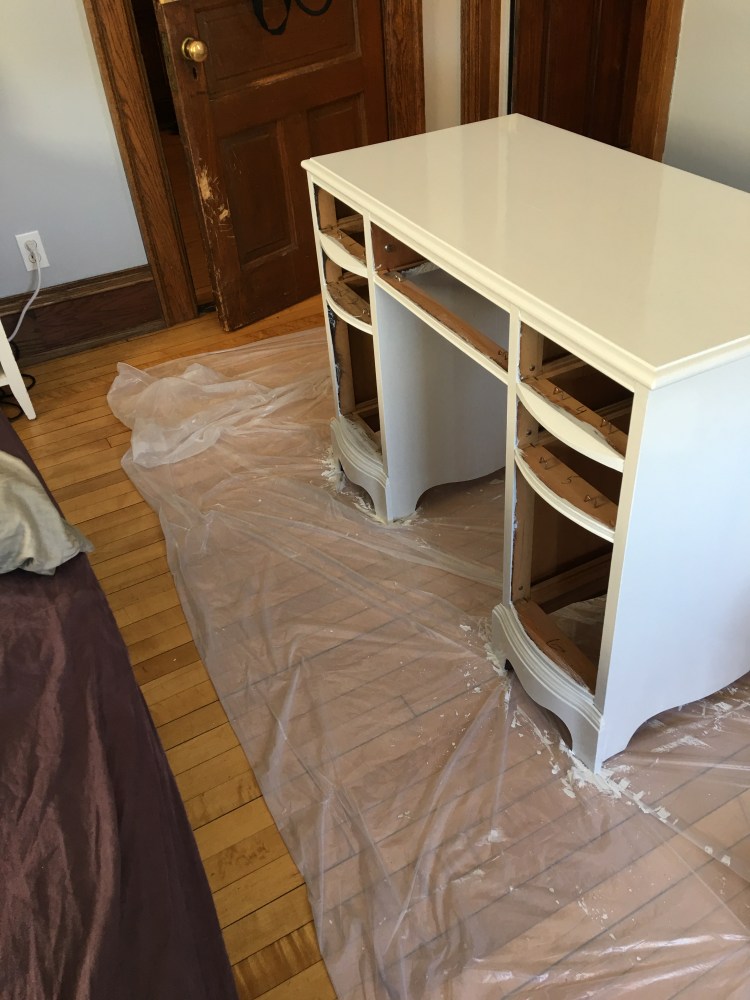
You want to let your first coat dry for at least 16-24 hours before doing the second coat. I only did two and I thought it looked perfect. *Don’t forget to paint the drawers! After your second coat, wait 2-3 days before putting any items, especially heavy items on the surface. 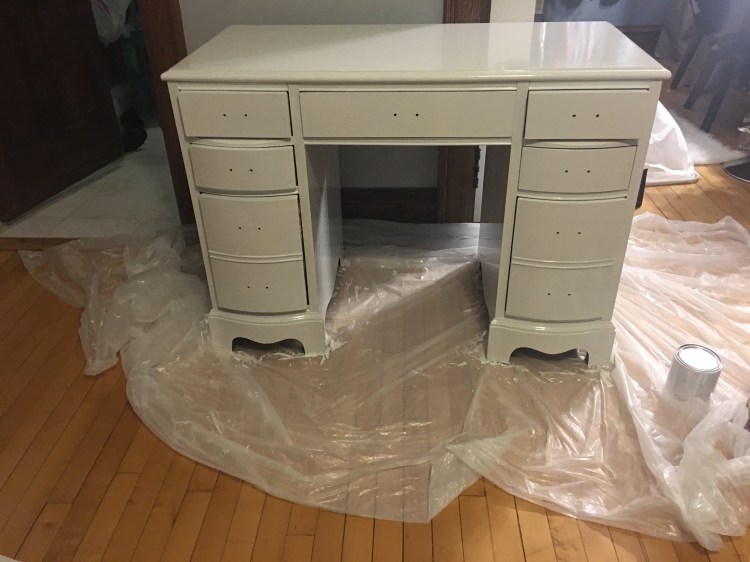
In the meantime, you can work on your hardware. I would not spray paint the hardware indoors. I went outside on my balcony – it was cold and rainy but it worked out. When spray painting the hardware shake the can, I mean really really shake the can before starting. You want to hold the nozzle 10-12 inches away from the pieces your’re spraying and then slowly go back and forth over them. I did two coats of spray paint letting it dry for a full day in between each. I also spray painted a picture frame and a mason jar to use as decor.

After everything is dry, all you have to do is put the desk back together and add whatever it is you need for your workspace.

I am so happy with how this piece turned out. I have been using it for about a month now and the only thing I can say is – I wish I would have done it sooner.
What do you think? Feel free to leave your comments below!

Wow this is amazing work. I always go into furniture stores and pay ridiculous prices for desk and other pieces to improve decor and the functionality of my home. I had never thought of doing this type of project. The finished product looks virtually new off the sales room floor and only at a fraction of the cost of a brand new desk. I can’t wait to see your next peice.
LikeLiked by 1 person
Thank you for your kind words. I totally agree with you as far as cost. This project was less than $100. Actually, it was closer to $80. The desk is solid oak which you just don’t find in stores today. At least not without forking over a ton of cash.
-Alexandra
LikeLike
Beautiful diy project. The desk turned out great. Thanks for sharing.
LikeLiked by 1 person
Thank you! I am glad you like it. Stay tuned for a new project soon.
LikeLike
You did an absolute fabulous job. Always admired your creativity in your interior design. I am looking for the same thing decent work space with a lot of drawers. Not for pens (ha ha) but for my notebooks and organizer for school and, well, life.
LikeLike
Thank you for your comment. Let me know if there is anything I can do to help! I will keep my eye out for a desk if you haven’t already found one.
LikeLike
Beautiful job! Simple and easy instructions. Keep the projects coming.
LikeLike
Thank you! I will have another project soon.
LikeLike